Ian Fennelly's Process
Great urban sketches may look spontaneous and effortless, but behind every masterpiece is a solid process.
Ian Fennelly, known for his vibrant and energetic sketches, follows a structured approach that helps him consistently capture the essence of a scene. Whether you’re a beginner or an experienced sketcher, understanding this process can give you the confidence to create dynamic sketches of your own.
Let’s take a closer look at the key steps Ian follows when sketching on location.
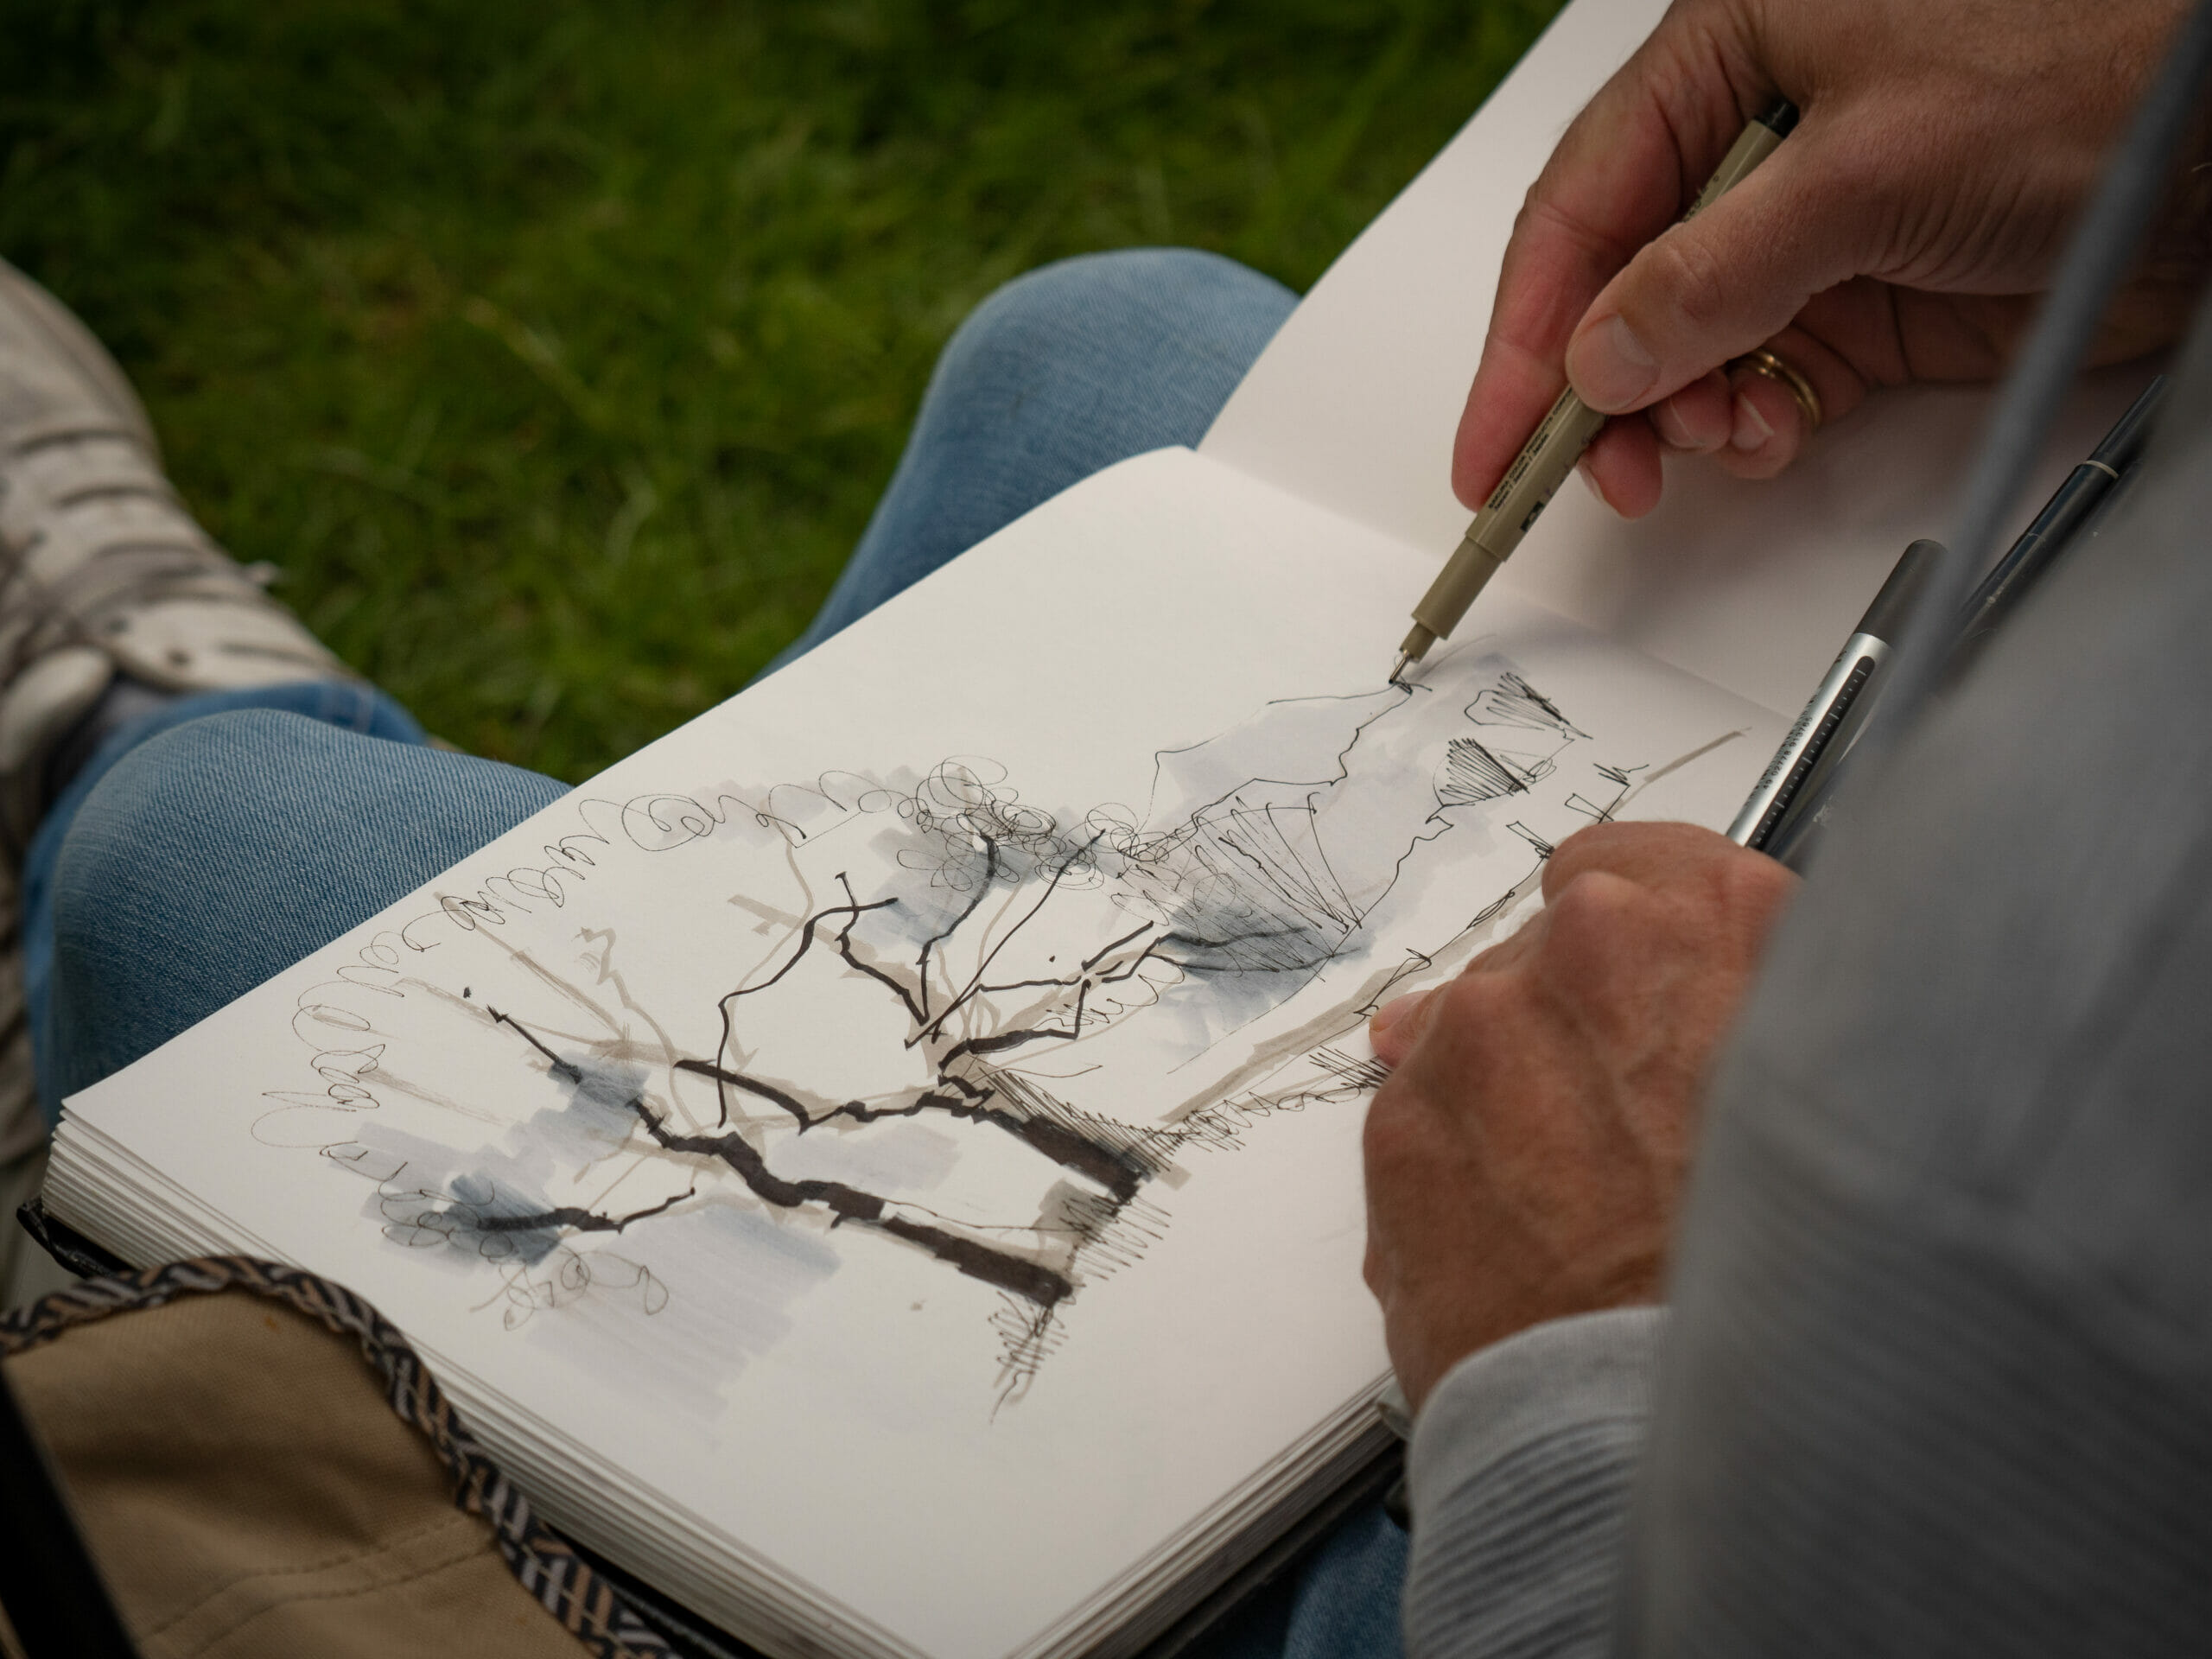
Step 1: Pen Placement – Seeing Before Drawing
Before making any marks on the paper, Ian starts with a pen placement exercise. This involves holding his pen over the sketchbook, visualizing the key lines, angles, and composition. It’s a way of mentally mapping out the sketch without committing to any permanent marks just yet.
This simple but essential step helps with observation, ensuring that the perspective and proportions feel right before moving forward.

Step 2: Big Shapes – Blocking Out the Scene
Next, Ian begins sketching loosely, focusing on the big shapes within the scene. At this stage, buildings, trees, and street elements are simplified into circles, squares, and rectangles.
This approach helps establish perspective and structure while keeping the sketch dynamic. Instead of getting caught up in the details too early, Ian prioritises composition, spacing, and balance.
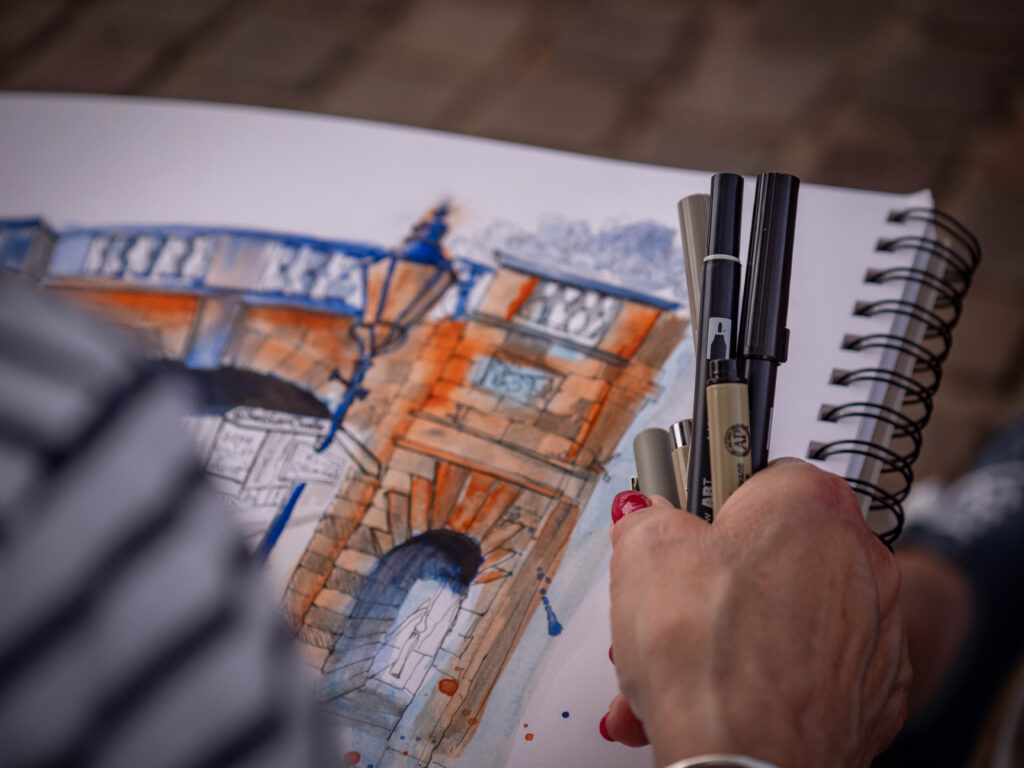
Step 3: Establishing Structure with Fine Liners
Once the major shapes are in place, Ian reaches for a fine liner to define the structure. This is where the scene starts to take shape, with buildings, windows, and architectural details becoming more recognisable.
Instead of drawing everything at once, he breaks down complex forms into simpler components—buildings become rectangles, arches become curved lines. This method makes urban sketching feel much more manageable.

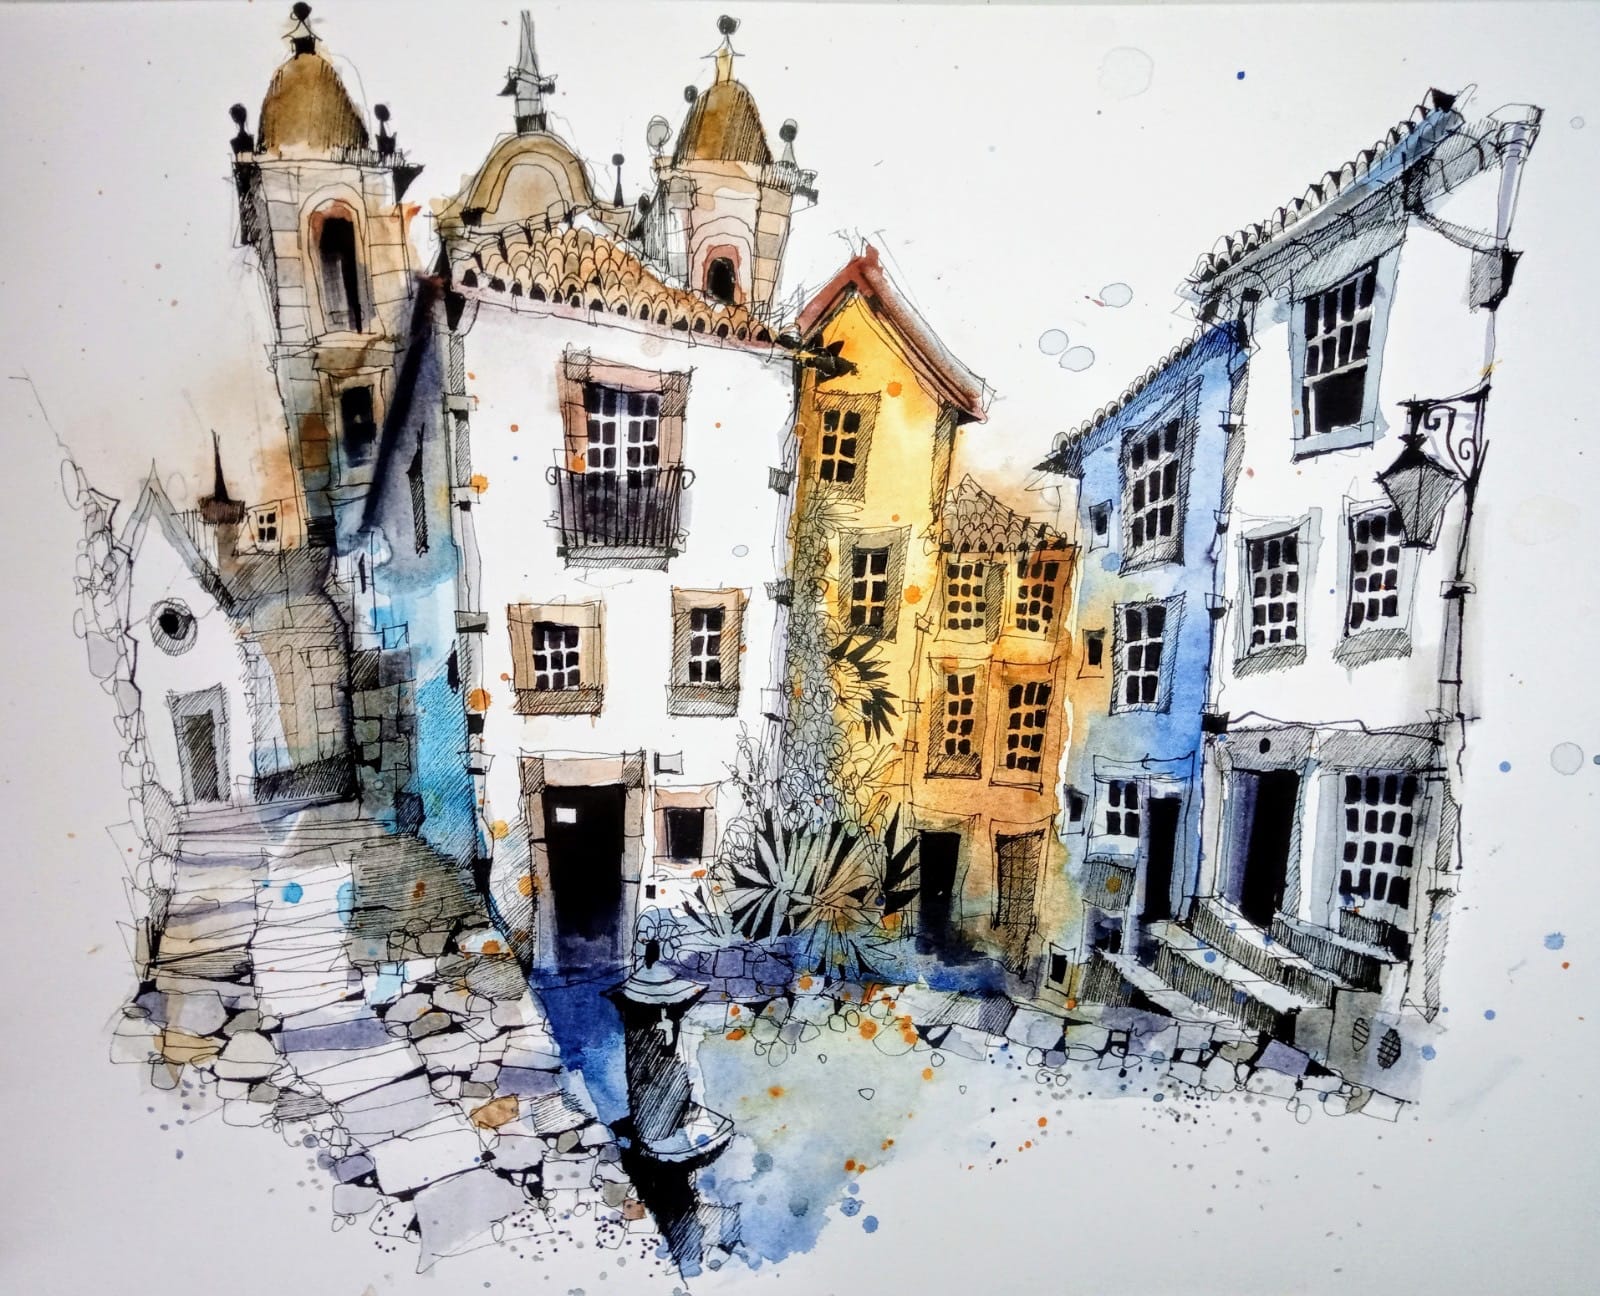
Step 4: Adding Energy with Watercolour
Now for the fun part—adding colour!
Ian applies watercolour in a way that lets it “play on the page.” By using a limited palette (usually three to five colours), he keeps the sketch cohesive and harmonious. Layering washes gradually builds depth, creating a sense of atmosphere without overloading the composition.
A key trick? Leaving areas of white space to allow the paper itself to contribute to the final piece.

Step 5: Enhancing Depth & Texture with Brush Pens
Once the watercolour is dry, it’s time to introduce tonal contrast with brush pens. Ian uses Tombow brush pens to define light and shadow, helping elements stand out while integrating different parts of the scene.
Darker tones are placed in the foreground, while lighter tones recede into the background—this simple technique enhances depth and realism. At the same time, brush pens help “calm down” overly bright areas, keeping the balance just right.

Step 6: Refining Details & Storytelling
With the structure and colours in place, Ian moves on to refining textures and details. Fine liners add final touches like windows, brickwork, foliage, and pavement textures.
But this stage isn’t about adding everything—it’s about choosing what matters most. Selective detailing helps tell the story of a place, guiding the viewer’s eye and making the sketch feel alive.

Step 7: Layering & Integration Without Overworking
Each stage builds upon the last, creating depth and cohesion through careful layering. Varying line thickness and tonal contrasts enhances the sense of space, making the sketch feel more dynamic.
But knowing when to stop is just as important as knowing how to add detail. Overworking a sketch can take away its freshness, so Ian frequently steps back, evaluates, and makes sure every layer enhances rather than overwhelms the piece.

Why This Process Works
By breaking down a scene step by step, this method makes urban sketching feel more intuitive and less overwhelming. Each stage has a purpose, allowing you to build up your sketch gradually while still leaving room for personal expression.
And that’s the beauty of urban sketching—it’s not about following rigid rules but about finding your own rhythm. Ian often adapts these steps depending on the subject, sometimes combining or skipping stages as needed.
The key takeaway? Start with a strong foundation, trust the process, and make it your own. With practice, you’ll develop your unique sketching style while capturing the world around you in a way that feels natural and rewarding.
Ready to learn more?
Learn the art of urban sketching with Ian Fennelly in our Beginner’s course as he guides you through 47 easy-to-follow lessons, with practical exercises, that transform you from complete beginner to skilled urban sketcher!