
Why Hatching Goes On Top of the Paint
- Blog
- October 20, 2026
- 20 mins
Most of us treat texture as something to plan for.
You look at an old timber building, you can see the wood is going to need a lot of work, and somewhere in the back of your mind you start budgeting for it.
Leave room. Don’t go too dark too early. Keep the wash light so there’s somewhere for the pen to go.
Then you spend the whole sketch protecting a space for something you haven’t drawn yet, and every decision before it gets more careful than it needs to be.
There’s a simpler way round it, and it’s mostly about order. The hatching goes on last, on top of the paint. So the thing that makes a building look old isn’t something you have to plan for at the start. It’s the last thing you do.

Where the Hatching Sits in the Order
Pen placement. Initial drawing. Big shapes. Watercolour. Tone. Then detail, which is where the hatching lives.
The important part is that the hatching comes after the paint, not under it. As Ian puts it while he works across a beam:
“You see how this hatching is sitting on top of the coloured tone that went on before.”
– Ian Fennelly
Nothing you do with the pen at that stage is limited by what the watercolour did, because the watercolour has already happened and you can see exactly what it gave you. You’re not trying to guess, halfway through a wash, how much texture a wall is going to need. You put the colour down, you look at it, and then you decide.
And on an old subject, that last stage carries a lot. Ian is clear about it: “the hatching is going to be a really big thing in these sketches.”
It Does More Than One Job
Most of us learned hatching as a way of making something darker. That’s the first of its jobs, but it isn’t the only one.
“The hatching is giving me not just tone, as you know, but it’s giving me texture.”
– Ian Fennelly
Tone is how dark. Texture is what a thing is made of.
That’s the difference between a beam that’s a grey shape and a beam that’s a piece of wood. Ian picks up a 0.2 fine liner and works across it “really, really quickly”, and it stops being a rectangle filled in and starts being timber that’s been out in the weather for a few hundred years.
Because it’s quick, it belongs at the end. You’re not committing an hour to it.
The Third Job Changes How You Use It
The angle of your strokes tells the eye which way a surface runs.
Ian sets it out plainly. Diagonal hatching is “kind of like neutral”: it makes something darker without saying anything about the plane it sits on. Vertical and horizontal hatching, though, “not only gives tone but also gives direction as well.”
So hatching up the face of a kerb tells you the kerb rises. Ian adds it there “not just to introduce tone but to also show that the kerb goes up.” Hatching along the road tells you the road goes away from you. Hatching across a beam tells you the beam lies flat.
At that point you’re not shading. You’re describing a surface.
It isn’t a rule you set once, either. Working across a cambered road, Ian changes direction partway because the road itself has changed angle: “as it goes further over, it’s getting further away from your position, so the angle is changing. I need to do some vertical, some horizontal ones now.”
The surface changed, so the strokes changed. That’s the whole technique.
Why This Makes Old Buildings Easier
An old building has more planes in it than a new one.
A modern wall is one flat face. A timber-framed one is a wall, plus a beam sticking out of it, plus an infill panel set back from both, plus an upper floor jutting out over the lot, plus a roof that has sagged in the middle. Five surfaces, all facing slightly different ways, in a very small space.
If you try to describe that with outline alone, you end up drawing every edge and the sketch gets tight and busy.
If you describe it with hatching direction, you can leave half the edges out, because the strokes on each surface tell the eye which way it runs.
That’s why the last stage can carry so much. You’re not adding decoration. You’re adding the information that stops the building looking flat.
The Pens
Ian works with fine liners, swapping between a 0.3, 0.2 and 0.1 depending on how delicate the passage is. For hatching small areas, he says it “doesn’t really matter” which of the three you use.
He rarely cross-hatches.
The variation comes from pressure, spacing and speed. That’s worth knowing, because cross-hatching is what most of us reach for when we want something darker, and it’s the fastest way to lose the direction you just set up.
If you need it darker, put the lines closer together or press harder, and keep the direction. For more on the mark itself, our guide to Mastering Hatching has the basics and some exercises to build the habit.
Try This on a Sketch You’ve Already Finished
You don’t need a new sketch for this one.
Find a painted sketch you’re not precious about, ideally with a building and a road or pavement in the foreground.
Pick one surface. Not the whole thing, just one: a wall, a kerb, a roof or one beam.
Work a few quick strokes across it, in the direction that surface actually runs. Up the face of the kerb. Along the road. Across the beam.
Then stop and look at how much older it looks.
Do the same to a second surface running a different way, and you’ll see the two start to separate from each other on the page.
Know When to Stop
Hatching is the easiest thing in a sketch to overdo, because it’s quick and it works.
Once you see what it does to one beam, it’s tempting to do it to everything. If every surface is hatched, none of them stands out, and you’re back to an even texture that reads as noise.
Pick the surfaces that matter: the ones catching the light, the ones turning away, the ones you want the eye to travel along. Leave the rest to the paper and the wash.
Ready to learn more?
Urban Sketch PLUS members get dedicated hatching training with Ian, plus live sessions, workshops and a friendly community to share your sketches with
Why Hatching Goes On Top of the Paint

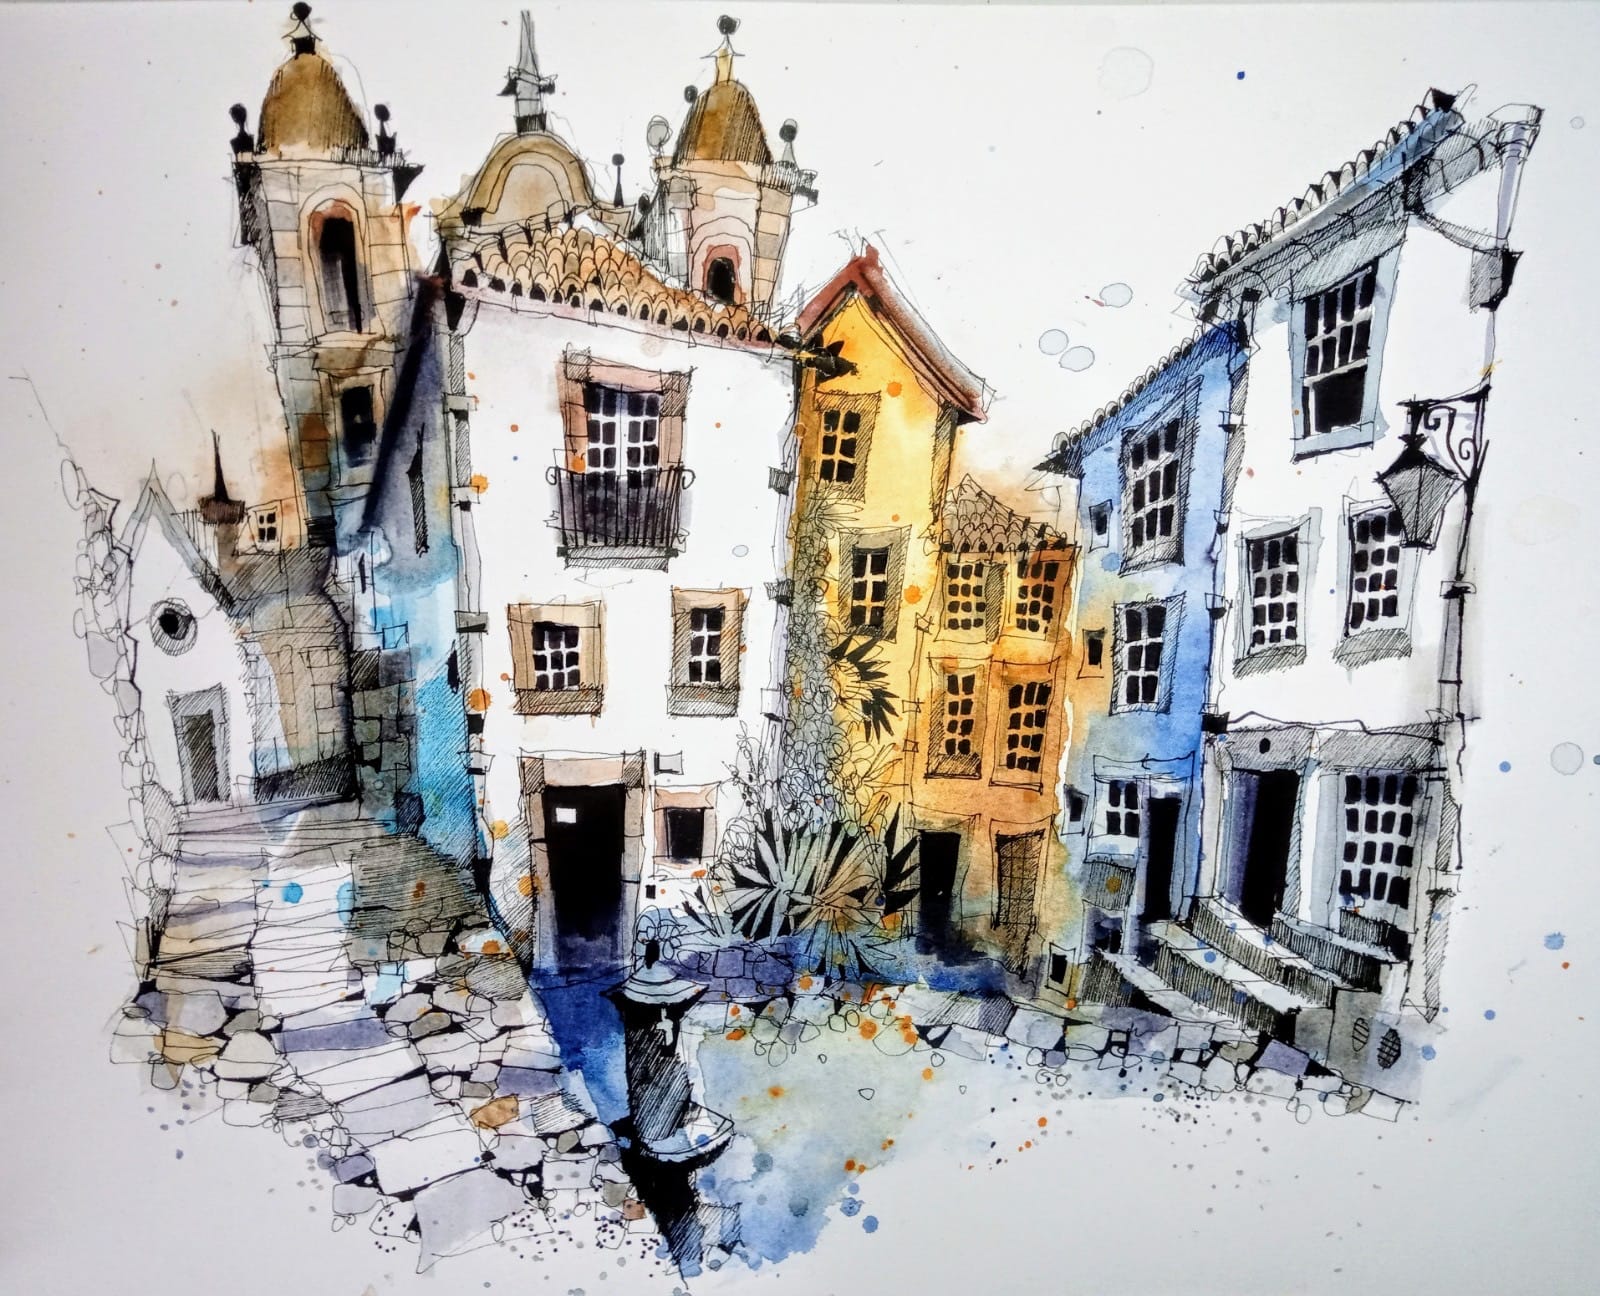

About the Artist
Ian Fennelly focuses on capturing urban spaces and environments by drawing the places where people have been without actually including them.
His process involves layering watercolors, brush pens, and liners to build depth, texture, and detail, allowing them to fully immerse in the scene while adapting to changes in their surroundings.
About Urban Sketch Course
- More Blog Posts -
- 15 mins

- 22 mins

- 21 mins

- 28 mins